Project Background
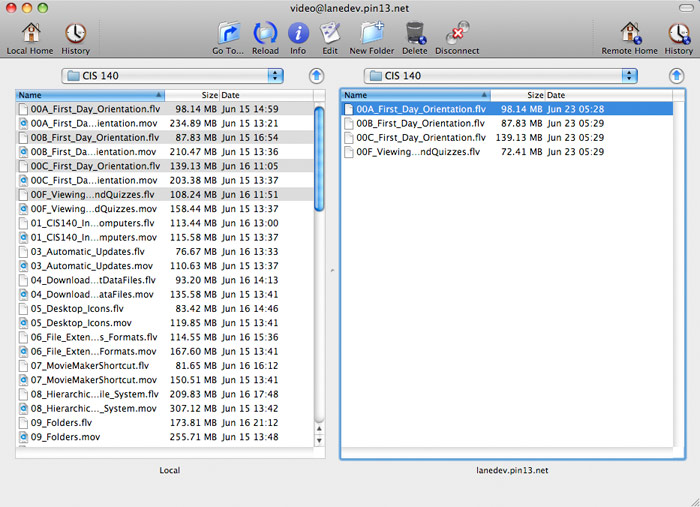
Many classroom-based as well as online classes at LCC have videos that accompany the class. The current system for distributing videos to students is barebones at best. There is a web server onto which all faculty can upload video files via FTP. Once logged in, they can create a folder for their course videos, and the videos will be displayed in an Apache directory listing page as seen below.
There are many benefits to such a simple approach. * Easy for faculty: The only thing required is to know how to use an FTP client * Easy for sysadmins: No new username and password database needs to be maintained
However, this approach has many drawbacks as well, mainly that the end result is not very user-friendly for students.
The goal of this project was to create a better way to display the videos on the web, while maintaining the ease of use for faculty and administrators.
The Finished Product
The end result is a website that looks and functions somewhat like YouTube.
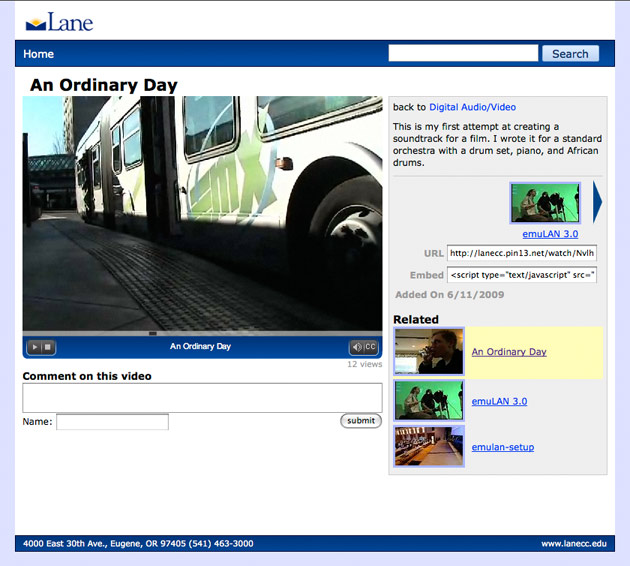
The frontend looks like a typical video sharing website, although the backend has been designed to be as similar to the existing setup as possible.
Instructions
Converting Videos to Flash Format
The primary difference with the new system is that videos must now be uploaded in Flash format rather than in Quicktime or other formats. This helps ensure cross-platform compatibility of the course videos.
After you've created your video file, you will need to use the Adobe Flash Video Encoder to convert your video to a .flv file. Drag your video into the main program window, and it will look like the below screenshot.
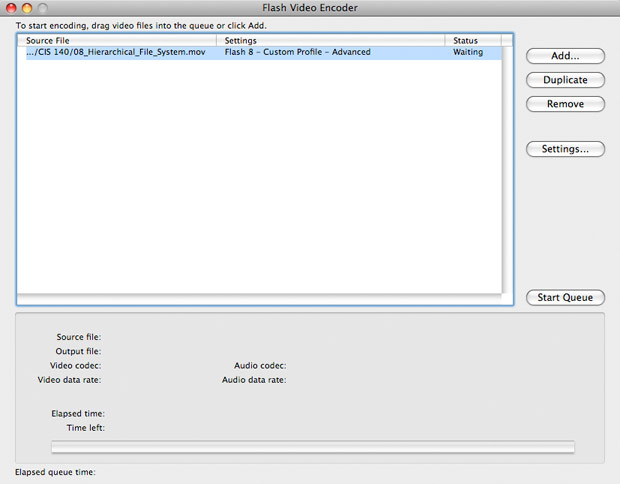
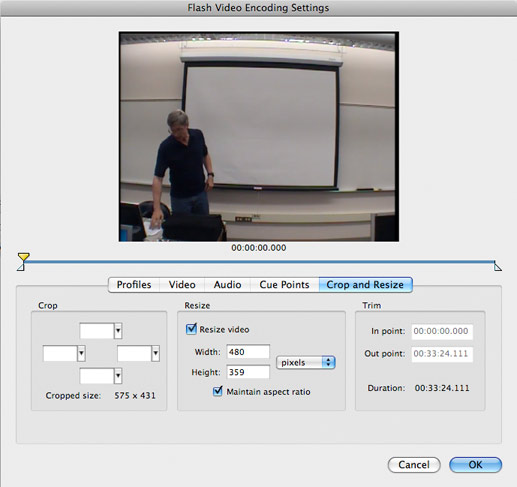
Click on the video file, then click "Settings". Click the "Crop & Resize" tab, and check "Resize video". Enter "480" for the width, and the height should adjust automatically. Resizing the video like this will make the file smaller and allow it to be downloaded quicker.
Uploading the Videos
Log in to the video server with your FTP credentials. Browse to or create the folder for your course. In this example, the course is CIS 140. Upload all the .flv files into this folder.
Entering the Video Information
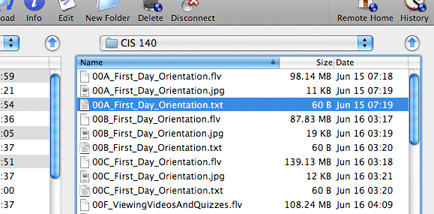
After a minute or so, the server will find the videos you uploaded. It will create two additional files for every video you upload with the same file name as your videos but ending in .txt and .jpg. You can edit the .txt file to enter information about your video such as the title and description. You can replace the .jpg file if you want to use a different image as the thumbnail.
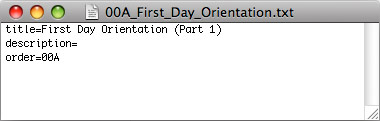
Open the text file and there will be three lines. On the first line you can enter a title for the video. If no title is entered, the filename will be used instead. On the second line you can enter a description. It is important to note that the description must be all on one line, although you can include line breaks by entering <br /> in the line. The last line, "order," is used to sort the videos if you want to sort them by something other than the title. In the case of this CIS 140 class, it is better that the videos appear in course order rather than alphabetical order, and using this additional field means you don't have to name the videos with a prefix.
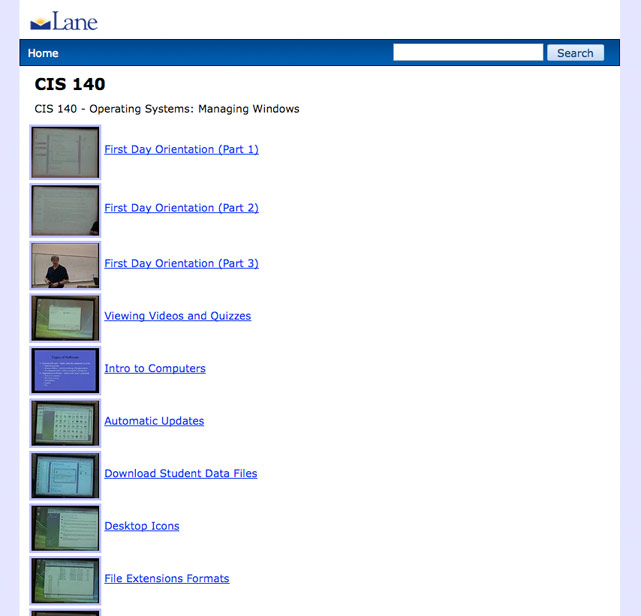
Class Homepage
All the videos for a class are uploaded into a single folder which allows the website to build a "class homepage." This view replaces the Apache directory listing we saw at the beginning.

Video Page
A video's page has links to the next and previous videos in the course, as well as a list of all videos in the course under the "Related" section.
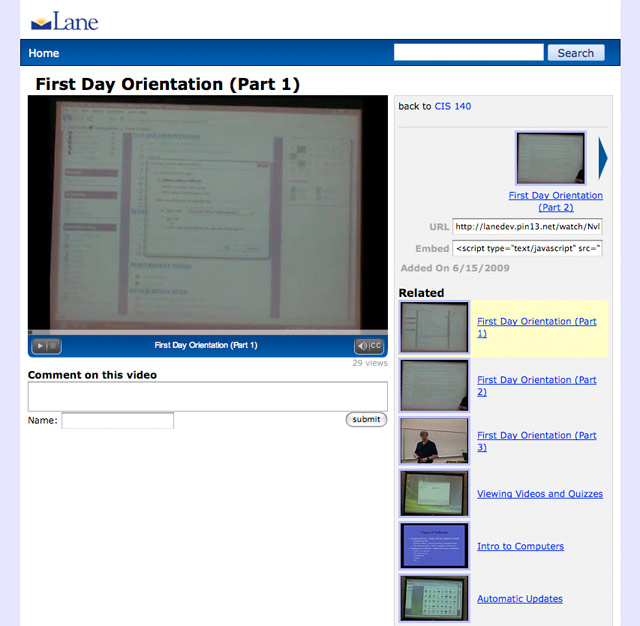
Comments on videos appear under the main video player.
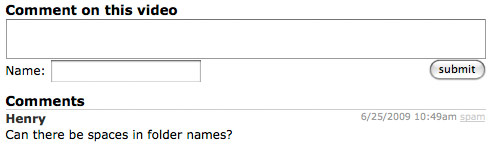
All comments are initially accepted and displayed. If a comment is flagged as spam by viewers, it will be hidden.