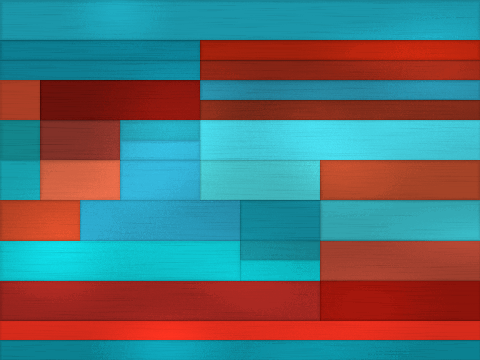
A computer program generated the image you see above. There were two goals: create a program that can generate pieces of artwork which will look different every time it is run. The generated art should not look obviously like it came from a computer at first glance. There are five steps to creating the above piece.
Description of the Algorithm
Color
The first step of the algorithm I created is to determine the color scheme which will be used throughout the drawing process. It first picks a single random color, or more accurately, a single hue. From there, it picks one, two or three complementary colors based the hue value of the original color. Once the colors are chosen, they are saved for later use.
Shape
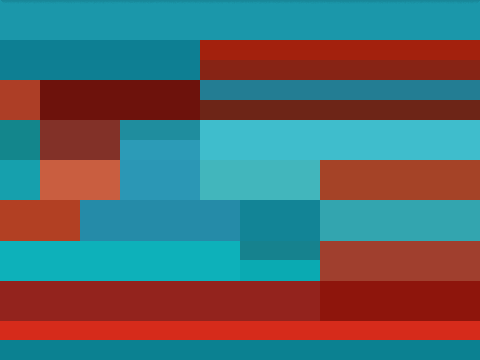
Generating the rectangle shapes is the next step. A random number of rows and columns are chosen, but always between 6 and 12. It starts at the top and bottom, always with a full row. From there proceeding towards the center, each row divides one of its cells at a random position. For example, the top row may be a single cell of width 8, and the next row may be divided into two cells of widths 6 and 2. The following row may divide the 6 into 3 and 3. This process continues until the middle row is reached. Each rectangle is assigned a random color from the palette, with a little entropy introduced to the color. The exact same color will never be used twice. If it decides to draw a certain rectangle in "red", it will actually take "red" and slightly adjust it, brighter or darker, and even slight adjustments to the hue. At the end of the rectangle stage, the image looks like a bunch of completely flat rectangles, with no shading or variation other than the colors.
This initial setup process happens extremely quickly, even for large images. What follows is the rather long process of adding the subtle variations and shading to the image.
Edge Shading

The edges of each rectangle are traversed, and a slight shading effect is applied. Each edge is darkened a different amount and at a slightly different width. This gives the seams between rectangles a little depth.
Broad Brightening
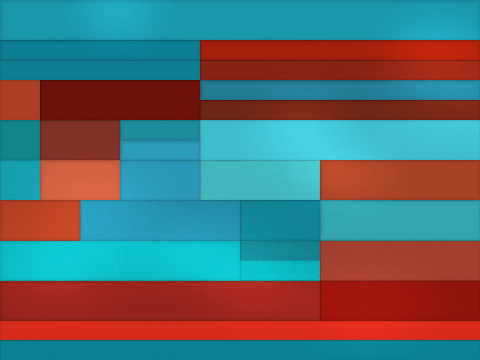
The part that takes the longest follows. Twenty random points in the image are chosen. For each point, a large rectangle is centered at the point. Each rectangle is approximately 1/4 to 3/4 the width and height of the entire image. Each rectangle is brightened with a shading pattern so that the brightest spot is in the center, and progressively less adjustments are made towards the edges. A sine function is used to create a change in brightness that is smooth and not linear. At each point within the rectangle, the sine function is raised to a random power between 3 and 6. The effect of the random power is that the gradient produced is not perfectly smooth, but has a subtle rough texture. The process of shading in these 20 rectangles takes about 20-30 minutes for an image the size of the large one I printed.
Horizontal Strokes

The final step is adding the horizontal strokes to the image. Each stroke is anywhere from 1/10 to 1/2 the width of the image. It again uses a sine function raised to a random power in order to add some variation to the darkness of the stroke. Four thousand strokes are drawn randomly across the image.
The end result is a colorful collection of rectangles, shaded in such a way so that it is not immediately apparent that the image came from a computer program. The programming I have done guides the entropy to produce similar but unique images every time the program is run. The rules that I have defined guide the randomness. For example, even though random numbers drive the creation of the horizontal strokes, they are only being generated within the parameters I specify. A completely randomly created image would look almost like TV static. But by guiding the randomness, I am able to define parameters which will create aesthetically-pleasing images.
Complete

https://aaronparecki.com/2009/03/13/1/algorithmic-art
I actually printed this out and it's still hanging on my wall at home!